Ever clicked a link, stared at a blank screen, and then bailed? We all have. In today’s lightning-fast digital world, slow websites are a death sentence. And what’s often the culprit? Huge, unoptimized images. That’s where image compression comes in – it’s not just a ‘nice to have,’ it’s essential for anyone serious about their website. Think of it as giving your site a serious speed boost and making Google *much* happier.

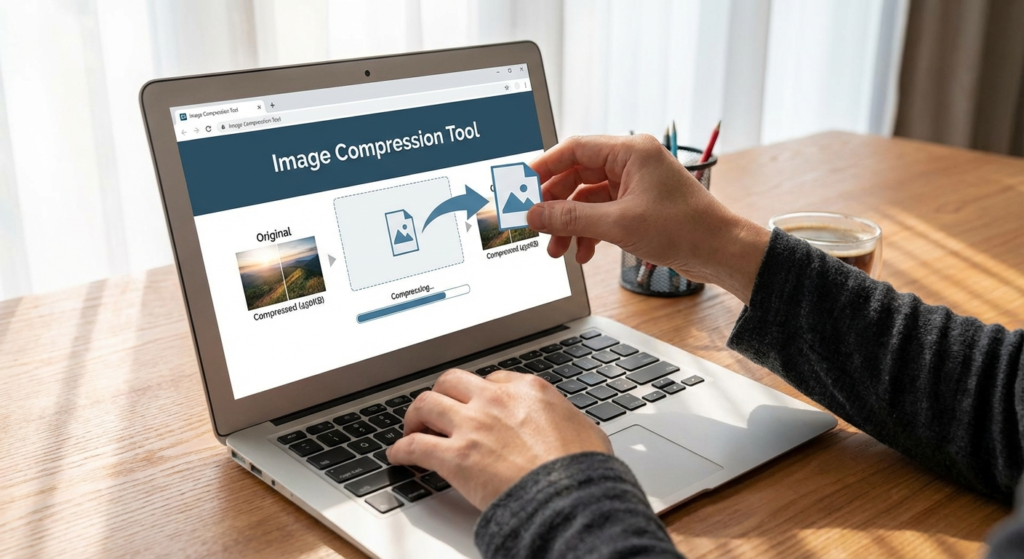
Image compression is basically shrinking your image files without making them look terrible. It’s like packing a suitcase super efficiently – same stuff, less space. By using a good image compression tool, you can massively improve load times, keep visitors engaged, and even climb higher in those all-important search results. Let’s dive into how it all works, why it matters for SEO, and how to do it right.
Understanding the Science Behind Image Compression
To really get why image compression is so important, let’s peek under the hood. Digital images are made up of tiny squares called pixels, each holding color and brightness data. High-res images have *millions* of these pixels, leading to massive files that hog bandwidth. Compression algorithms work by finding patterns and redundancies in this data – clever, right?
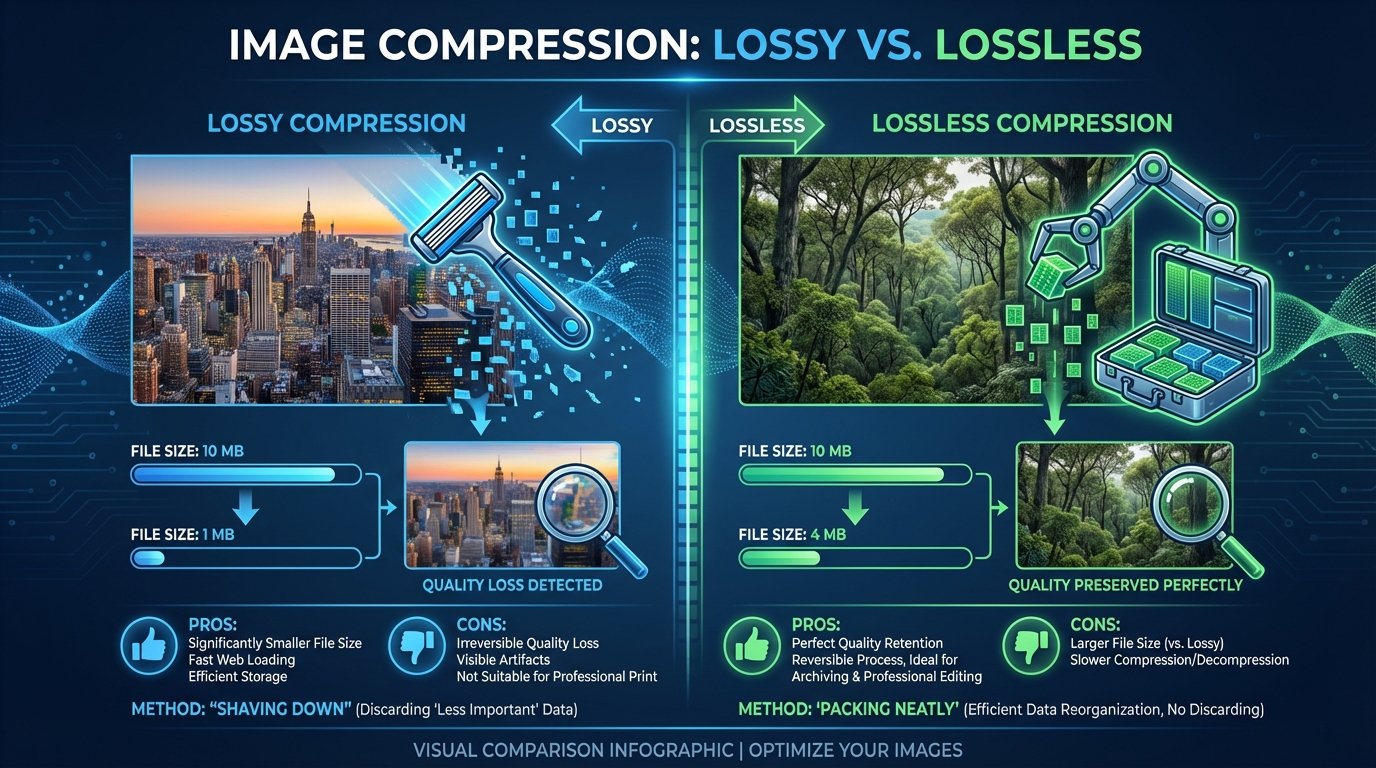
Now, there are two main types of compression: lossy and lossless. Knowing the difference is key to optimizing your visuals.
Lossy Compression
Best for: Web photos and complex JPEGs.
This method *permanently* removes some data from the image file. This gives you much smaller files (often 70-90% smaller!), but it *can* slightly reduce quality. Thing is, modern algorithms are so good that you often can’t even see the difference.
Lossless Compression
Best for: Logos, transparent PNGs, and technical diagrams.
This method compresses the image *without* removing any data. You don’t get as much file size reduction as with lossy, but the image quality stays perfect. It’s like neatly folding your clothes instead of throwing them in a bag.
Lossy vs. Lossless: Which Should You Choose?
It all depends on what you’re doing. If you’re a photographer showing off your work, you might want lossless or very high-quality lossy to keep every detail. But for most of us – blog posts, product photos, news articles – aggressive image compression (lossy) is the way to go. It gives you the best balance of quality and speed. It’s about finding that sweet spot.
Why Image Compression is a Must-Have for SEO
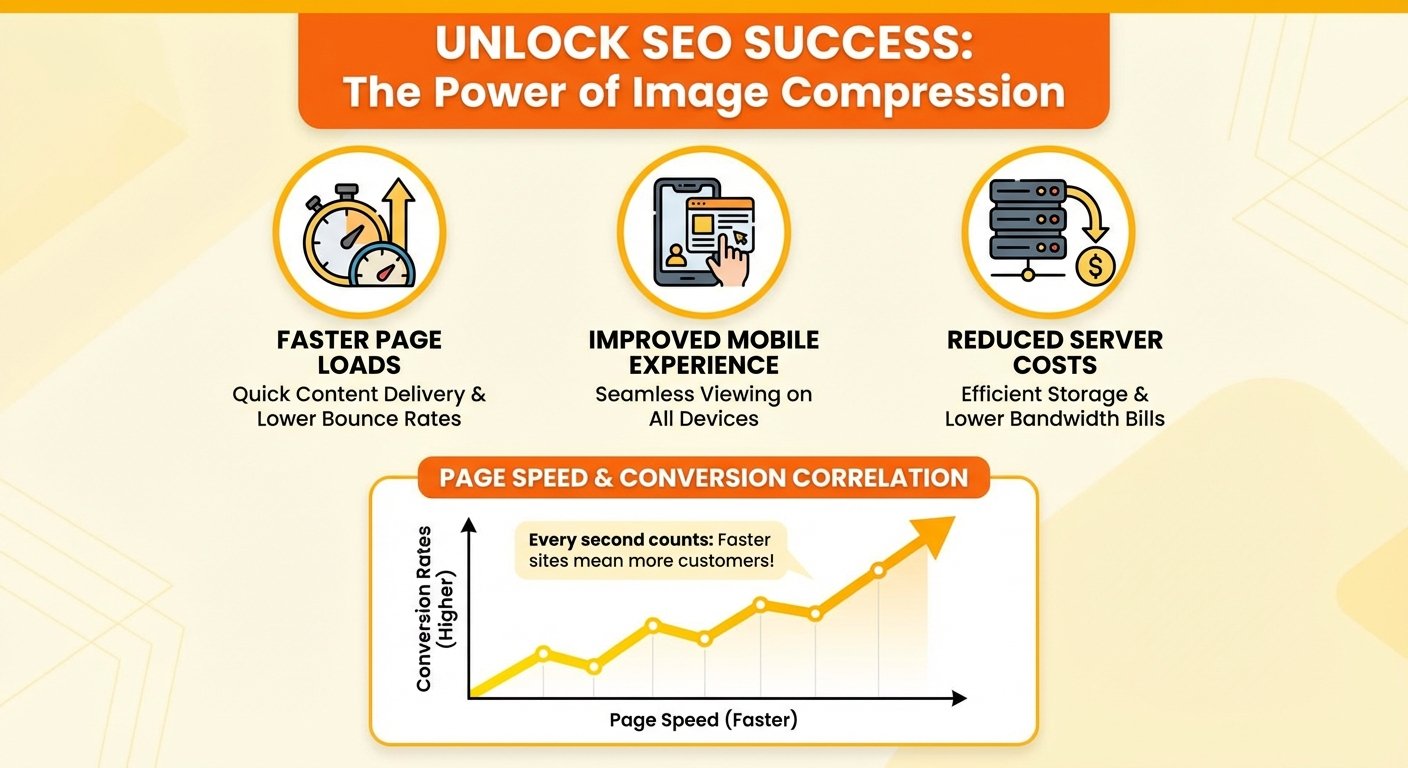
SEO isn’t just about keywords anymore; it’s about making users happy. Google’s Core Web Vitals update puts a huge emphasis on site speed, how quickly things respond, and how stable the page is visually. Here’s why image compression is a cornerstone of any good SEO strategy:
- Faster Page Load Speeds: Images are often the biggest part of a webpage. Smaller images = faster loading. Google themselves say faster sites keep people around longer and reduce bounce rates.
- Better Mobile Experience: Google uses the mobile version of your site to decide how to rank it. Mobile users are often on slower connections. Optimized images make sure your site loads quickly, even on 4G.
- Save on Server Costs: Smaller files mean less storage space and less bandwidth used. This can save you a *lot* on hosting costs.
How to Compress Images Like a Pro
Using a compression tool is easy, but doing it *strategically* gets the best results. Whether you want to optimize specific file sizes or compress a bunch of images at once, the process is usually pretty similar. Here’s a step-by-step guide:
1. Selection
Pick the right images. Make sure they’re the right dimensions *before* you upload them. Compressing a huge image that’s only going to be displayed small is just wasting resources.
2. Upload & Settings
Upload your files to the tool. Choose your compression level (e.g., standard, aggressive, or lossless) based on the image type.
3. Processing
The tool analyzes the image and applies the compression. This usually takes seconds, depending on how many files you have.
4. Verification
Always check the result! Make sure the image compression hasn’t made the image look blurry or distorted.
Choosing the Right File Type Matters
Before you even compress, make sure you’re using the right file type. The effectiveness of compression depends on the format:
- JPEG: The go-to for photos. Handles colors well and compresses nicely.
- PNG: Best for images with transparency or text. PNGs are generally larger and harder to compress without losing quality.
- WebP: A modern format that offers better compression than JPEG or PNG. WebP lossless images are smaller than PNGs, and WebP lossy images are smaller than JPEGs.
Don’t Make These Common Image Compression Mistakes
Even with great tools, it’s easy to mess up. One common mistake is over-compressing. Push the image compression too far, and you’ll get pixelation or banding, which looks terrible and hurts your credibility. No one wants to see blocky images!
Another mistake is ignoring metadata. Cameras store EXIF data (shutter speed, location, date) inside image files, which adds unnecessary weight. A good tool should strip this automatically. When deciding between free vs paid online tools, see if the tool offers bulk metadata removal. It’ll save you time.
The Future is AI-Powered Image Compression
Image compression is always evolving. We’re starting to see AI-powered tools that can intelligently analyze images and compress different parts differently. For example, AI might compress the blurry background of a photo more aggressively while keeping the main subject sharp.
Also, formats like AVIF are becoming more popular, offering even better compression than WebP. Staying up-to-date is key. For more techy details, check out MDN Web Docs.
In Conclusion: Compress or Get Left Behind
Using an image compression tool isn’t optional; it’s vital. It boosts your SEO, saves bandwidth, and keeps visitors happy with fast load times. By understanding lossy vs. lossless, choosing the right formats, and using the right tools, you can keep your site fast and visually appealing. It’s a no-brainer, really.
The goal is to find the perfect balance between performance and quality. Start checking your images today, and you’ll likely see an immediate improvement. What are you waiting for?
Frequently Asked Questions
It depends. Lossless compression keeps 100% of the quality. Lossy compression removes some data, which *might* cause a slight reduction in quality, but it’s usually not noticeable if done right.
WebP is generally considered the best. It balances quality and file size better than JPEG and PNG. But JPEGs are still great for photos if WebP isn’t an option.
You can often reduce file sizes by 50% to 80% with lossy compression without a huge impact on quality. Lossless compression usually yields reductions of 10% to 20%.
Most tools automatically strip metadata (EXIF data) like camera settings, location, and date to reduce file size further.
Absolutely! Page speed is a ranking factor for Google. Images often make up most of a page’s size, so compressing them leads to faster load times and better search rankings.

