
Imagine waking up one morning to find your organic traffic has flatlined. Zero. Nada.
I’ve seen it happen. A client called me in a panic because their entire site had vanished from Google overnight. The culprit? A single misplaced forward slash in a text file that weighs less than 1KB.
That file is robots.txt.
For many WordPress users, this file is an afterthought. You install an SEO plugin, toggle a switch, and forget about it. But here’s the thing: in 2026, with AI-driven search engines and crawl budgets tighter than ever, understanding how to create robots.txt for WordPress isn’t just a technical chore—it’s a survival skill.
This isn’t just about blocking bots. It’s about directing traffic. It’s about telling Google, “Hey, ignore the junk in the back room; look at the masterpiece in the gallery.”
In this guide, we’re ditching the textbook definitions. I’m going to show you exactly how to configure this file to maximize your SEO performance, protect your server resources, and avoid the catastrophic mistakes that kill rankings.
📑 What You’ll Learn
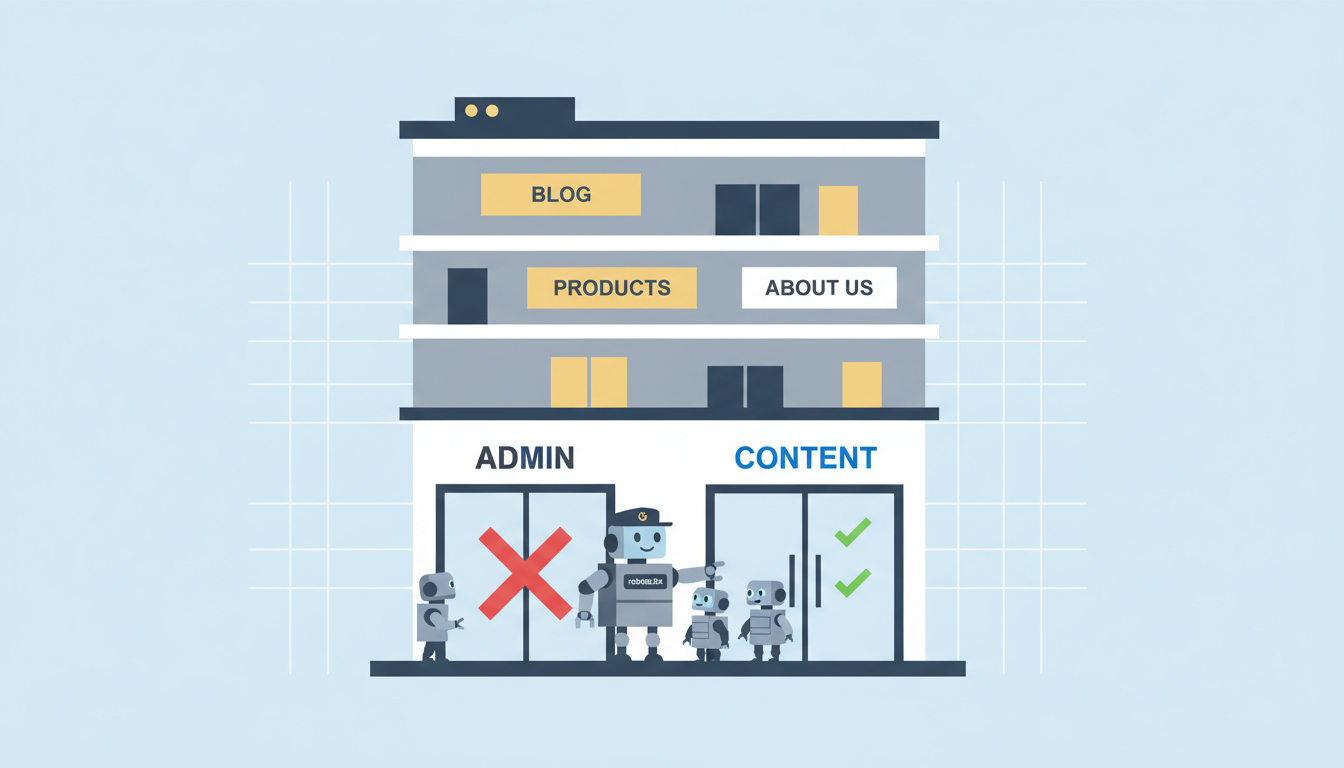
The “Bouncer” of Your Website: What is Robots.txt?
Think of your website as an exclusive club. Googlebot, Bingbot, and other crawlers are the guests trying to get in. Your robots.txt file is the bouncer standing at the door with a clipboard.
It doesn’t physically lock the door (that’s what password protection is for). Instead, it politely asks the bots, “You can go into the lounge (your blog), but stay out of the kitchen (your admin files).”
Technically speaking, it’s a text file sitting in your site’s root directory that uses the Robots Exclusion Protocol. Before a bot crawls a single page of your site, it checks this file first to see the rules of engagement.
Why Crawl Budget is the New Gold Standard
You might be thinking, “My site is small. Why do I care?”
Here’s the reality of the web in 2026: There is too much content and not enough computing power to index it all instantly. Search engines assign your site a Crawl Budget—a limit on how many pages they will scan within a given timeframe.
If you don’t manage this, bots will waste their limited budget crawling useless WordPress junk like:
- Theme folders
- Plugin scripts
- Internal search result pages (
?s=search-term) - Admin login pages
If Google spends 80% of its time crawling your plugin directories, it might miss that new, high-value article you just published. By optimizing your robots.txt, you force search engines to focus 100% of their energy on your money pages.
🎯 Key Takeaway
Your robots.txt file is a traffic controller, not a security guard. Its primary job in 2026 is to preserve crawl budget by preventing bots from wasting resources on low-value URLs, ensuring your actual content gets indexed faster.
The Perfect WordPress Robots.txt Template
Let’s cut to the chase. You want to know what a “good” file looks like.
In my experience auditing hundreds of sites, I’ve found that simpler is often better. Complicated rules lead to conflicts. Below is a highly optimized, safe template for a standard WordPress site.
User-agent: *
Disallow: /wp-admin/
Allow: /wp-admin/admin-ajax.php
Disallow: /wp-content/uploads/wpo-plugins-tables-list.json
Disallow: /?s=
Disallow: /search/
Disallow: /wp-json/

Sitemap: https://yourdomain.com/sitemap_index.xml
Breaking Down the Directives
Let’s decode what’s happening here so you aren’t just copy-pasting blindly.
| Directive | What It Does | Why It’s Crucial |
|---|---|---|
User-agent: * |
Targets ALL bots (Google, Bing, etc.). | Sets the baseline rules for everyone. |
Disallow: /wp-admin/ |
Blocks the backend dashboard. | Bots have no business crawling your admin area. |
Allow: /wp-admin/admin-ajax.php |
The Exception. Allows access to AJAX. | Many themes use AJAX for frontend features. Blocking this breaks your site’s functionality. |
Disallow: /?s= |
Blocks internal search results. | Prevents “spider traps” where bots crawl infinite search combinations. |
Sitemap: [URL] |
Tells bots where your map is. | The fastest way to get new content discovered. |
⚠️ Watch Out
Never use Disallow: /wp-includes/ or Disallow: /wp-content/ blindly!
Years ago, this was standard advice. Today, it’s dangerous. Google needs to access CSS and JavaScript files inside these folders to “render” your page properly. If you block them, Google sees a broken page and may drop your rankings.
Step-by-Step: How to Create & Edit Your File
You have two main paths here. You can be the “Hacker” (manual upload) or the “Strategist” (using a plugin). I recommend the plugin route for 99% of users—it’s safer and easier to manage.
Method A: The Easy Way (Using SEO Plugins)
If you use Yoast SEO, Rank Math, or All in One SEO, you don’t need to touch an FTP client. These plugins create a “virtual” robots.txt file.
1. Using Yoast SEO
- Log in to your WordPress dashboard.
- Go to Yoast SEO > Tools.
- Click on File editor.
- If you don’t have a robots.txt file, a button will appear to “Create robots.txt file.”
- Edit the text box with the template provided above and hit Save changes to robots.txt.
2. Using Rank Math
- Go to Rank Math > General Settings.
- Select Edit robots.txt.
- Rank Math usually locks this by default to prevent accidents. You may need to add a small code snippet to your
wp-config.phpto unlock it, or simply trust their default (which is usually excellent).

Method B: The Manual Way (FTP/SFTP)
For the purists or those not using an SEO plugin, here is how you do it manually.
- Create the File: Open Notepad (Windows) or TextEdit (Mac) and paste your rules. Save the file as
robots.txt(all lowercase). - Connect to Server: Open your FTP client (like FileZilla).
- Locate Root: Navigate to your
public_htmlorwwwfolder. This is the same folder wherewp-config.phplives. - Upload: Drag your text file into this folder.
- Verify: Go to
yourdomain.com/robots.txtin your browser. If you see your text, you’re live.
💡 Pro Tip
Case Sensitivity Matters.
Servers are picky. The file must be named robots.txt. Not Robots.txt, not robots.TXT. If you get the capitalization wrong, the bots will ignore it entirely, and your efforts will be wasted.
3 Critical Mistakes That Will Tank Your SEO
I’ve audited sites that were bleeding traffic simply because of a bad robots.txt configuration. Here are the traps to avoid.
1. The “Development” Leftover
When developers build a site on a staging server, they often use this line to keep Google away:
Disallow: /
This tells bots to block everything. The problem? Sometimes this file gets migrated to the live site. If you launch with this line active, your site will be de-indexed within days. Always double-check this immediately after launching a new site.
2. Confusing “Disallow” with “Noindex”
This is the most common misconception in technical SEO. They are not the same thing.
| Action | What it does | Result |
|---|---|---|
| Disallow (robots.txt) | “Do not crawl this.” | Bot doesn’t look at the page. BUT, if someone links to it, Google might still index the URL (without the content). |
| Noindex (Meta Tag) | “Crawl this, but don’t show it in search.” | Bot crawls the page, sees the tag, and removes the page from search results completely. |
The Verdict: If you want a page gone from Google (like a private “Thank You” page), use a noindex tag on the page itself. Use robots.txt only to save crawl budget on junk files.
3. Blocking Resources (CSS/JS)
I mentioned this earlier, but it bears repeating. Google renders pages like a modern browser. If you block your /wp-content/themes/ folder, Google sees your site as an ugly, unstyled HTML skeleton. This hurts your “Mobile Friendliness” score and can tank your rankings.

Testing: Don’t Guess, Verify
You wouldn’t push code without testing it. Don’t push a robots.txt file without validating it.
The gold standard tool is Google Search Console. Google provides a specific “Robots.txt Tester” (though it’s currently tucked away in their legacy tools or accessible via the live URL inspection).
How to test manually:
- Go to Google Search Console.
- Use the URL Inspection Tool.
- Inspect a page you want indexed (like a blog post).
- Click “Test Live URL.”
- Look at the “Crawl” section. If it says “Crawl allowed? Yes,” you are good.
- Now, inspect a page you blocked (like
yourdomain.com/wp-admin/). It should say “Crawl allowed? No: blocked by robots.txt.”
For a deeper dive into how Google interprets these files, check out the official documentation from Google Search Central.
Advanced: Robots.txt for WooCommerce
Running an online store? You have extra baggage. WooCommerce generates dynamic URLs for carts and checkouts that provide zero value to search engines.
Add these lines to your standard WordPress rules:
Disallow: /cart/
Disallow: /checkout/
Disallow: /my-account/
Disallow: /*add-to-cart=*
This ensures Google doesn’t waste time trying to index empty shopping carts or user account pages.
Conclusion
Creating the perfect robots.txt for WordPress isn’t about being a code wizard. It’s about being a smart traffic controller.
By implementing the clean, efficient directives we’ve covered, you ensure that search engines spend their time where it counts: on your high-quality content. You protect your admin areas, prevent duplicate content issues via internal search, and give your site the best possible foundation for ranking in 2026.
Your next step? Open a new tab, type yourdomain.com/robots.txt, and see what’s currently there. If it doesn’t look like the template above, it’s time to log in and make some changes.
❓ Frequently Asked Questions
Do I really need a robots.txt file for WordPress?
Technically, no. If you don’t have one, bots will assume they can crawl everything. However, this is bad for SEO because they will crawl admin pages, plugin files, and low-quality content, wasting your crawl budget. It is highly recommended to have one.
Can I use robots.txt to hide my site from hackers?
No. Robots.txt is a public file. Anyone can read it to see which directories you are trying to hide. In fact, listing sensitive directories here might actually alert hackers to where your sensitive files are. Use server-side password protection for true security.
How long does it take for changes to take effect?
Googlebot usually caches your robots.txt file for up to 24 hours. If you make a mistake and fix it, you can speed up the process by using the “Submit robots.txt” feature in Google Search Console to request a refresh.
What is the ‘Crawl-delay’ directive?
Some older bots (and Bing) respect a Crawl-delay: 10 directive, which tells them to wait a certain number of seconds between hits. However, Google ignores this. In 2026, most modern hosting can handle bot traffic fine, so this is rarely necessary unless you have a very weak server.
Should I list my Sitemap in robots.txt?
Absolutely. While you can submit sitemaps directly to Search Console, adding the Sitemap: line in robots.txt acts as a fail-safe. It allows other search engines (like Bing, DuckDuckGo, and Applebot) to find your content map instantly without manual submission.

