
Picture this: You’ve just found the absolute perfect asset for your campaign. The lighting is crisp, the composition is striking, and the subject matter is spot on. There’s just one problem. A massive, ugly timestamp from 1998 is burned into the bottom corner. Or maybe it’s a supplier logo on a product shot you actually have the rights to use, but the raw file is long gone.
Frustrating, right?
In the past, fixing this meant hours of painstaking cloning in Photoshop, pixel by pixel. Today, a watermark remover tool can seemingly work magic in seconds. But here’s the thing most people get wrong: they treat these tools like blunt instruments. They just hit “erase” and hope for the best.
That’s a rookie move.
To get magazine-quality results without leaving behind that tell-tale “smudged” look, you need to understand the mechanics under the hood. You need to know when to trust AI and when to take manual control. And, perhaps most importantly, you need to know exactly where the legal line is drawn so you don’t end up with a cease-and-desist letter.
In this guide, we’re going deep. We aren’t just deleting logos; we’re mastering the art of digital restoration.
📑 What You’ll Learn
The Tech: How Inpainting Actually Works
To use a watermark remover tool effectively, you have to stop thinking of it as an eraser. Digital erasers leave holes. High-end removal software is actually a reconstruction engine.
The industry term for this is “Inpainting.”
When you highlight a watermark, the software doesn’t just scrub those pixels away. It analyzes the “neighborhood” of pixels surrounding the selection. It looks at texture, gradient flow, noise patterns, and lighting direction. Then, it hallucinates—in a good way—what should be there if the text wasn’t.
Think of it like a master art restorer fixing a hole in a canvas. They don’t just patch it with white paint; they extend the brushstrokes from the surrounding area to make the repair invisible.
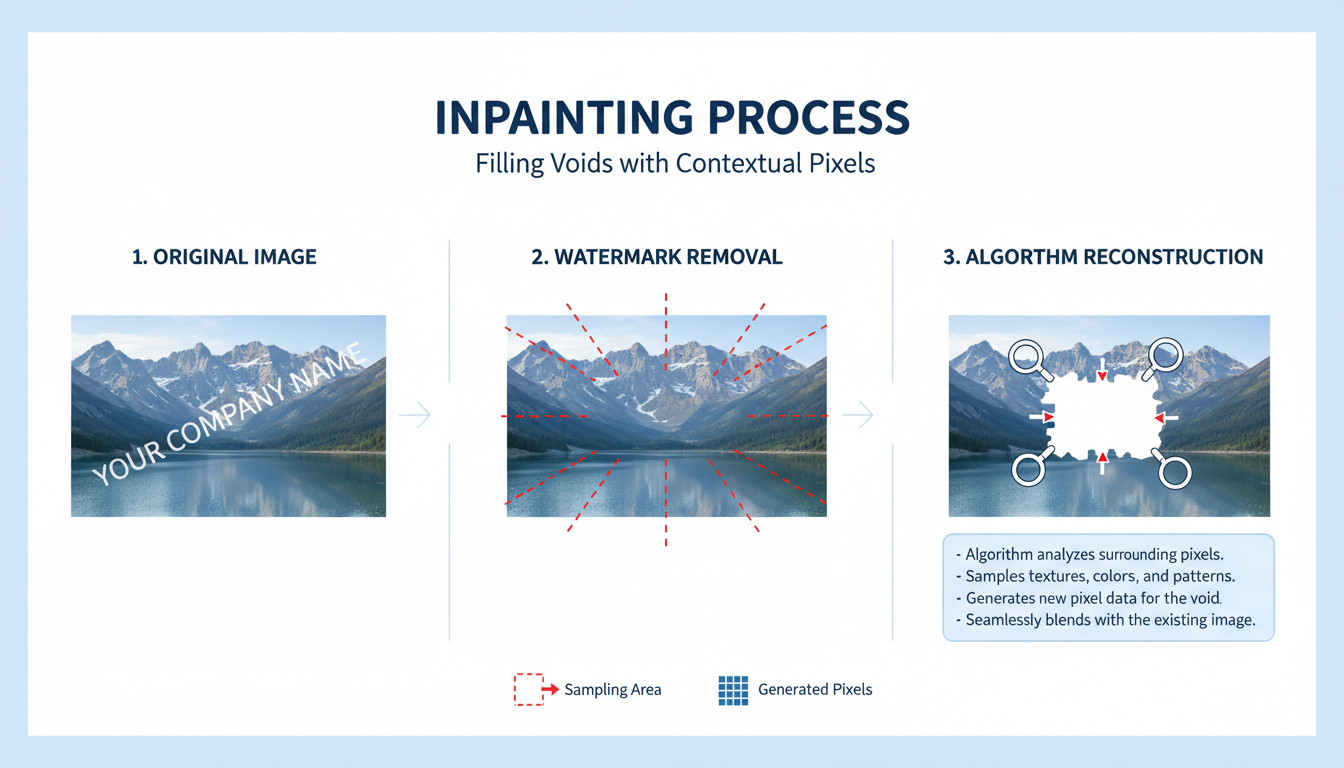
Early iterations of this tech relied on “pixel repetition,” which is why old edits looked like someone smeared Vaseline on the lens. Modern AI tools use deep learning models trained on millions of images to understand context. They know that if the background is a brick wall, the filled area needs mortar lines, not just red blobs.
💡 Pro Tip
Don’t highlight just the watermark text. Highlight a small buffer zone (about 3-5 pixels) around the text. This gives the AI more “context data” to blend the edges seamlessly into the background.
AI vs. Manual: The Showdown
I’ve spent over a decade in digital asset management, and I’ve seen the shift firsthand. There is a constant debate: do you trust the robot, or do you do it by hand?
The answer? It depends entirely on the complexity of the image.
If you are dealing with a flat blue sky, AI wins every time. It’s faster and cleaner. But if that watermark is sitting on top of a person’s face or a complex jewelry pattern? That’s where AI often fails, creating nightmare fuel instead of a clean edit.
Here is a breakdown of how the two approaches compare in real-world scenarios:
| Feature | AI-Driven Watermark Remover | Manual Editing (Clone Stamp/Healing) |
|---|---|---|
| Speed | Instant (Seconds per image) | Slow (Minutes to hours) |
| Texture Replication | Good for organic textures (grass, sky) | Superior for structured patterns |
| Precision | General area processing | Pixel-perfect control |
| Learning Curve | Zero (One-click) | Steep (Requires Photoshop skills) |
| Best Use Case | Batch processing, simple backgrounds | Complex details, faces, text reconstruction |
7 Proven Strategies for Flawless Removal
You have the tool. Now you need the technique. After processing thousands of images, here are the seven strategies that separate the amateurs from the pros.
1. The “Frequency Separation” Mindset
Even if you aren’t using Photoshop, think like you are. Watermarks affect two things: color and texture. Some basic tools fix the color but leave a smooth, texture-less blob. If your watermark remover tool allows it, process the removal, and then add a generic “noise” filter over the edited area. This brings the grain back, making the edit invisible to the naked eye.
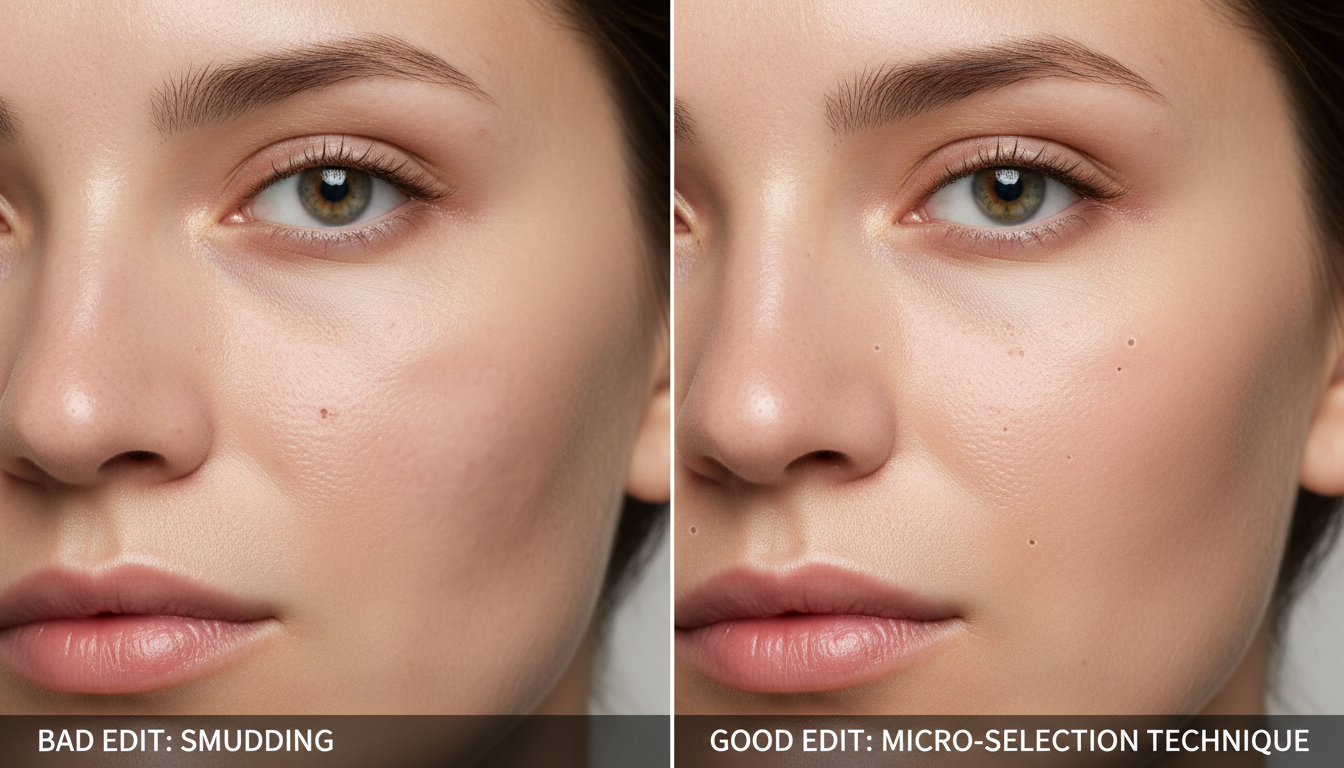
2. The Micro-Selection Technique
Don’t try to remove a massive watermark in one go. If the overlay covers a tree, a building, and the sky, the AI will get confused trying to reconstruct all three elements simultaneously. Break it down. Remove the part over the sky first. Then the building. Then the tree. Small bites prevent the AI from hallucinating weird artifacts.
3. Reverse Masking for Complex Objects
Sometimes, the watermark is lighter than the object behind it. In these cases, try darkening the specific area of the watermark using a “Burn” tool before running the remover. This reduces the contrast between the unwanted text and the background, helping the algorithm blend the pixels more effectively.
4. Batch Processing for E-Commerce
If you are a reseller dealing with supplier images, you likely have hundreds of photos with the same logo in the same spot. Don’t edit them one by one. Use a desktop-based watermark remover tool that supports “coordinate batching.” You define the area once, and the software applies that mask to 500 images while you go grab a coffee.
5. The “Clone First, Heal Later” Method
For stubborn watermarks, use a manual clone stamp to roughly cover the text with pixels from a nearby area. It will look rough. Then, run the AI healing tool over your rough patch. The AI is much better at smoothing out a rough clone job than it is at inventing new data from scratch.
⚠️ Watch Out
Avoid using web-based tools for high-resolution print assets. Most online removers compress your image to save bandwidth. If you upload a 4K image, you might get a 1080p file back. Always check the output resolution settings.
6. Restoring Metadata
Here is a detail everyone misses. When you run an image through a third-party tool, it often strips the EXIF data (camera settings, date taken, GPS). If you are archiving family photos or organizing business assets, this is a disaster. Always use software that preserves original metadata, or use a tool to copy the metadata back from the original file after editing.
7. The 200% Zoom Check
Never trust the thumbnail. Artifacts love to hide in the shadows. Always zoom in to 200% on the edited area. Look for “stair-stepping” on diagonal lines or color banding in gradients. If you see it, the edit isn’t done.
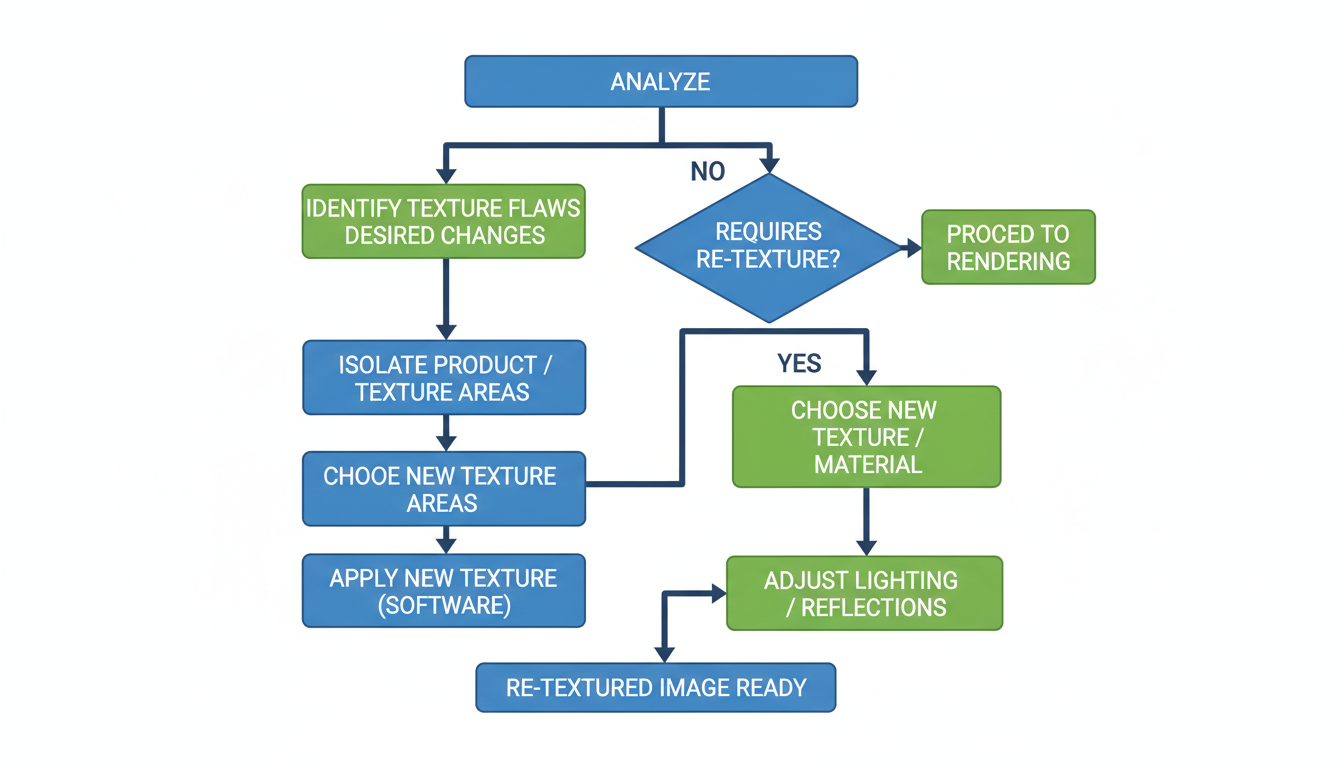
Step-by-Step: The E-Commerce Workflow
Let’s apply this to a real scenario. You have a product photo of a leather bag. The manufacturer sent it, but they slapped a “SAMPLE” text right over the leather texture. Here is how to save it.
- Analyze the Grain: Leather has a specific pattern. Look at the direction of the light.
- Select the Tool: For organic textures like leather, AI is usually safe. Open your watermark remover tool.
- Paint the Mask: Use a brush size slightly larger than the text. Paint over “SAMPLE.”
- Run Pass 1: Execute the removal.
- Inspect the Texture: Does the leather look smooth like plastic in that spot? If yes, we need to fix it.
- Re-texture (The Secret Sauce): If your tool has a “clone” or “stamp” feature, lower the opacity to 30%. Sample a clean piece of leather texture from nearby and lightly stamp it over the smoothed-out area. This brings the pores and grain back.
The Danger Zone: Legal & Ethical Use
We need to have a serious talk. Just because you can remove a watermark doesn’t mean you should. In fact, doing so can land you in hot water—specifically, federal court.
In the United States, the Digital Millennium Copyright Act (DMCA), specifically Section 1202, makes it illegal to remove “Copyright Management Information” (CMI) with the intent to conceal infringement. This isn’t a slap on the wrist; fines can range from $2,500 to $25,000 per image.
So, when is it okay? Here is a quick litmus test:
| ✅ Safe Zone (Generally) | ❌ Danger Zone (Illegal) |
|---|---|
| Removing timestamps from your own photos. | Removing a watermark from a stock photo to avoid paying $10. |
| Cleaning up “Shot on Android” logos from your phone. | Erasing a photographer’s signature to repost on Instagram. |
| Restoring public domain historical archives. | Removing a competitor’s logo to use their product shot. |
| Editing assets you have a license for (if the raw file is lost). | Modifying a document or ID card (Fraud). |
🎯 Key Takeaway
A watermark remover tool is for restoration, not theft. If you don’t own the rights to the image underneath the watermark, removing the overlay does not grant you those rights. Always secure a license first.
Frequently Asked Questions
Can AI remove watermarks from video?
Yes, but it’s much harder. Video watermark removers have to track the object across moving frames. They use temporal data (looking at previous and future frames) to fill in the gaps. It requires significantly more processing power than image editing.
Will removing a watermark lower the image quality?
It depends on the method. Web-based tools often compress images, lowering the overall resolution. Desktop software usually maintains the original file quality, only altering the specific pixels you selected.
Is there a way to remove a watermark transparently?
Not exactly. You are essentially destroying the pixels that contain the watermark and replacing them with a guess. However, high-end AI tools make this “guess” so accurate that it appears transparent to the human eye.
What is the best free watermark remover tool?
For quick, low-stakes edits, tools like Cleanup.pictures or Inpaint Online are popular. However, “free” usually comes with a catch—either lower resolution downloads or limits on how many images you can process per day.
Conclusion
The watermark remover tool has evolved from a clumsy digital eraser into a sophisticated AI assistant. Whether you are saving a family memory from a bad timestamp or cleaning up product inventory for your store, the capability is there. But remember: the tool is only as good as the operator.
Focus on texture matching, respect the legal boundaries of copyright, and don’t be afraid to zoom in and refine the details manually. Your images represent your brand—keep them clean, keep them sharp, and keep them honest.
Ready to clean up your visual library? Start by auditing your assets today and identifying which ones can be saved with these restoration techniques.

